
Template Management
Overview
When you create and deploy IoT solutions or apps, it involves some complicated setups. We suggest breaking down these setups into smaller pieces through templates to simplify deployment. This also makes it easier to set up, replicate, and fix any issues.
Think of a template as a blueprint for your device setup. It’s a file that explains how your devices should work together. This blueprint can be used again for different setups, making things consistent and easier to manage.
At /IOTCONNECT™, we offer a template to help you organize and control your devices and data. It’s like a guide for setting up your devices and deciding how they should behave.
This template simplifies setting up devices and how they send and receive data. It helps you keep track of your devices, define what kind of information they collect, and give them commands to perform specific tasks. You can also set rules for how each device should behave.
For example, if you’re a web developer creating websites, you might use a site template. This is like a starter pack for building a website, with the layout, menu, and sample content already set up. It helps you make websites quickly and easily.
In the same way, our template at /IOTCONNECT™ helps developers manage smart devices without starting from scratch every time. It’s like a guide that makes things faster and more organized.
Create a template
To create a template for your organization:
- From the left navigation, mouseover the Devices module. In the middle and toward the down, select Templates.
- Along the top and toward the right, select Create Template.
- Enter data in the following fields:

(Screen: Create Template)
- Template Code: Enter a unique code for the template. Once entered, you cannot change.
- Template Name: Enter a unique name for the template.
- Authentication Type: We offer a X.509 authentication to secure online communications and verify the identity of individuals or devices on a network.
- Device Message Version: Select the device message version. The platform displays the data type while editing a template based on a device message version.
- Click Save to create a template.
Required fields have a red asterisk on the upper-right side of every field name.
Once a template is saved, the window opens the fields to fill.
(Screen: Template Properties)
A template in /IOTCONNECT™ offers four features to set values – Properties. Attributes. Shadow. Commands. Consider setting values in all.
Properties

(Screen: Properties)
- Description: Enter a short description of the template.
- Data Frequency (in seconds): Defines the frequency of device-to-cloud messages sent from a device. This works with SDKs provided by /IOTCONNECT™. 5 seconds is the default minimum data frequency. If you would like to reduce the default data frequency below 5 seconds, we recommend you create a support ticket under enable feature section. We can then set your default desired data frequency. Without it you can enter data frequency 5 seconds or above.
- Click Save to save properties.
Required fields have a red asterisk on the upper-right side of every field name.
Attributes
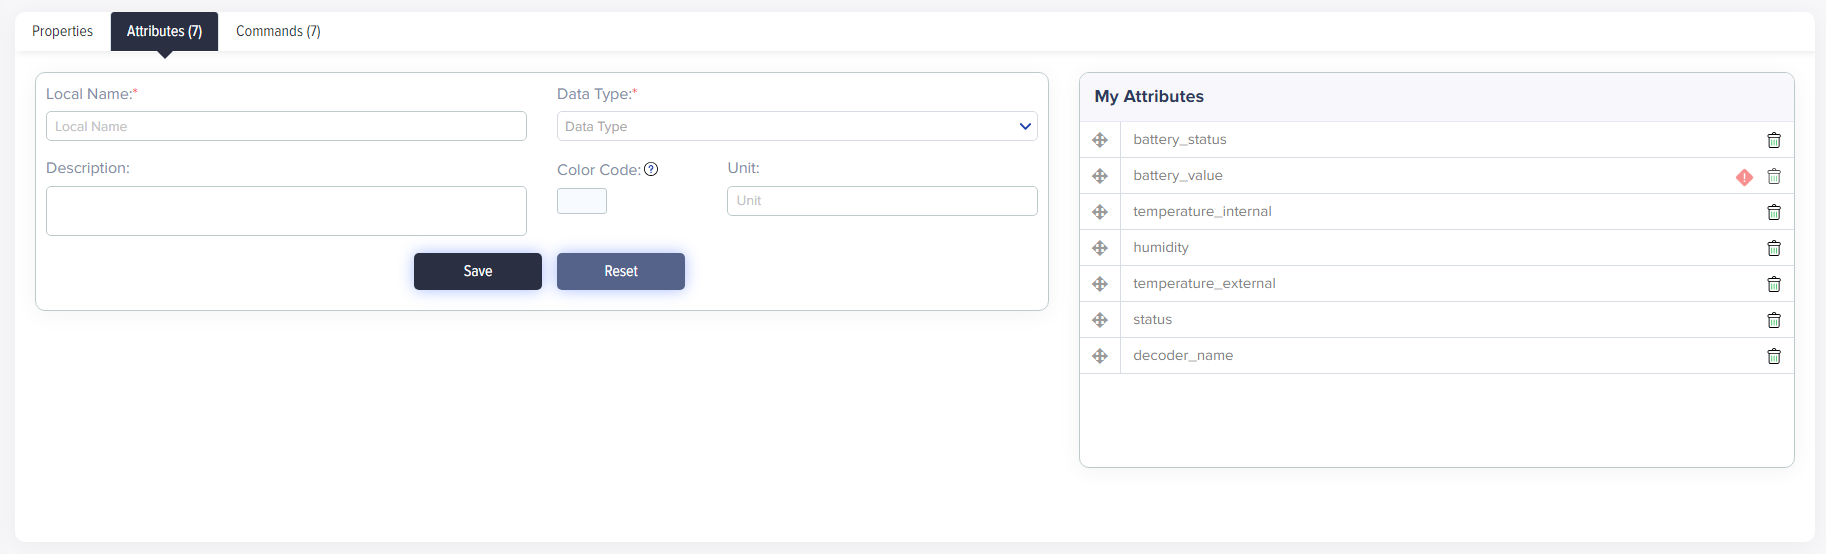
(Screen: Attributes)
- Local Name: Enter the unique local name for the attributes.
- Data Type: Type of data you can ask your device for reporting to /IOTCONNECT™. /IOTCONNECT™ supports the following data types.
| Bit (0/1) | Datetime | Latlong | String |
| Boolean | Deciman | Long | Time |
| Date | Integer | Object |
- Description: Enter an explanation for the attributes.
- Color Code: /IOTCONNECT™ will use this color while plotting data on a chart or map.
- Unit: Define the unit of an attribute.
- Click Save to store attributes.
Required fields have a red asterisk on the upper-right side of every field name.
Commands
Commands instruct a device to take action. In devices, commands include a name and parameter value. The device’s firmware takes the required action based on the command.
Parameter value: 10 ⁰C
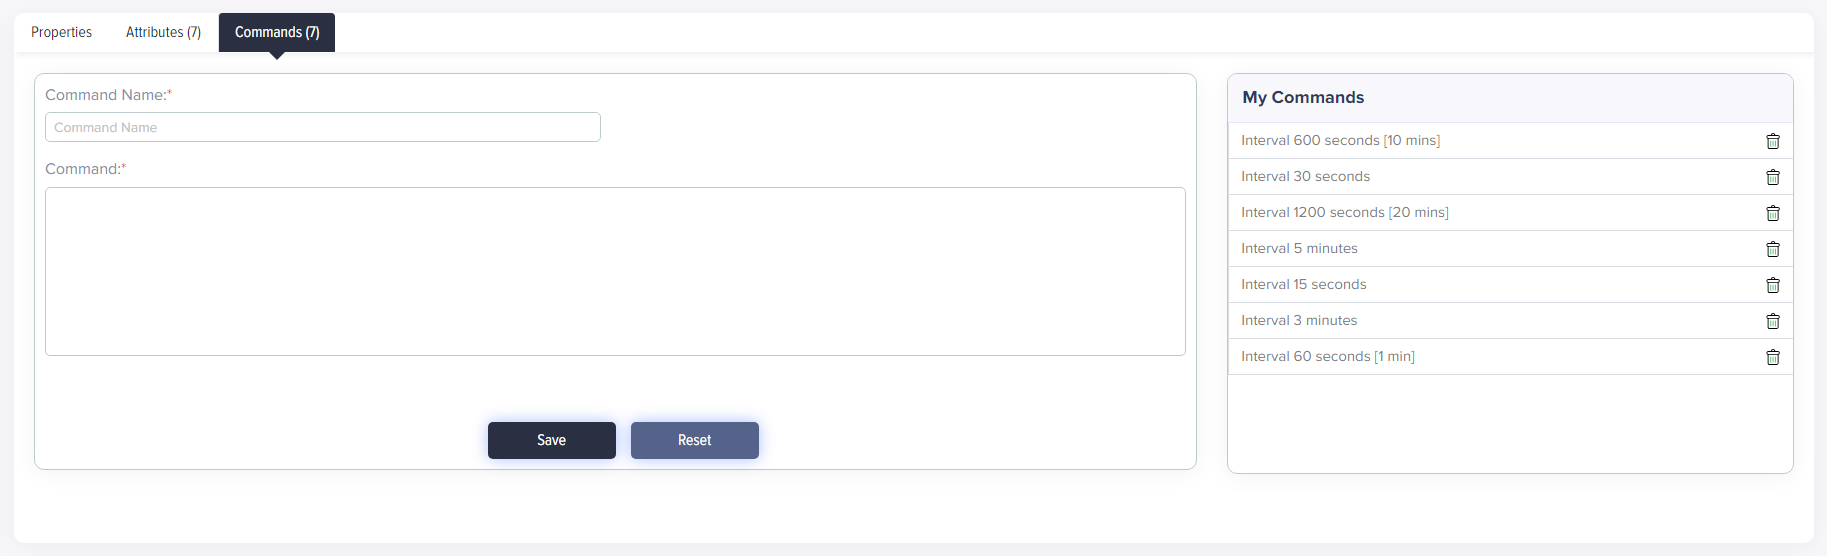
(Screen: Commands)
- Command Name: Enter the unique command name.
- Command: Enter the command that you want to give.
- Click Save to see it in device properties.
Required fields have a red asterisk on the upper-right side of every field name.
Note: Once you save properties, attributes, shadow, or a command, you will see them in a list on the right.
Template List
To view the template list:
- From the left navigation, mouseover the Devices module. Click Device. In the middle and toward the down, select Templates.
- The template list shows a template name, authentication type, message version, attribute, shadow, command, device, rule and actions.
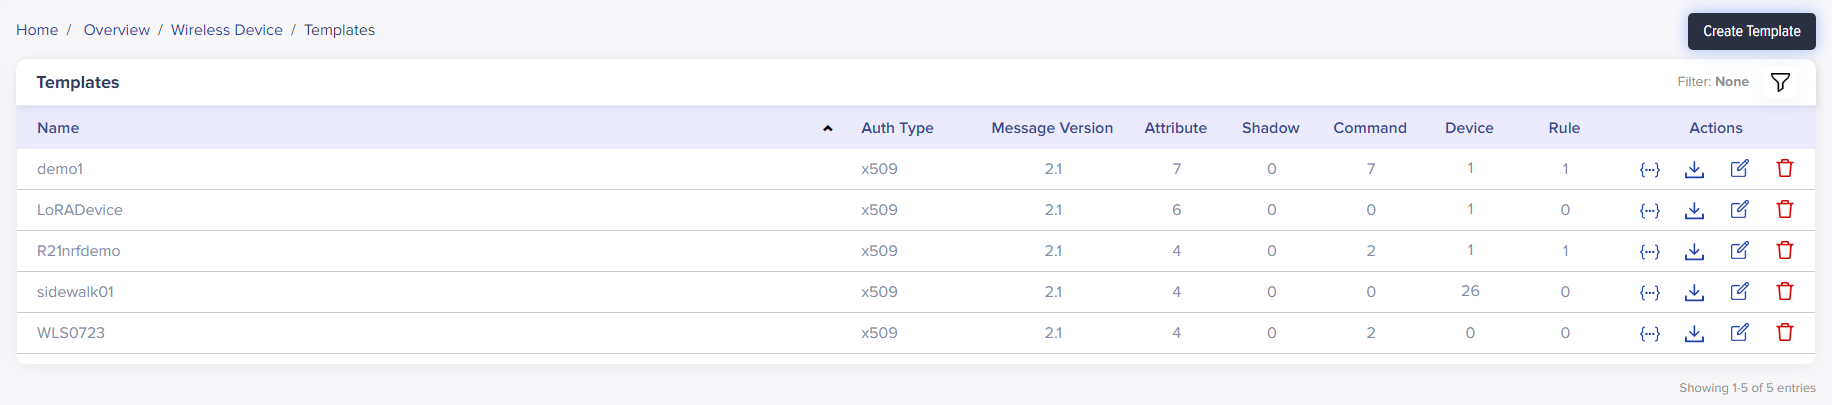
(Screen: Template List)
- Actions: You can view attribute/shadow property, download, edit or delete a template.
- Template Filter:
- Apply the filter from the top-right corner of the device list.
- Add filters like entity and device status by selecting the + icon.
- Add or remove any filter at any time.
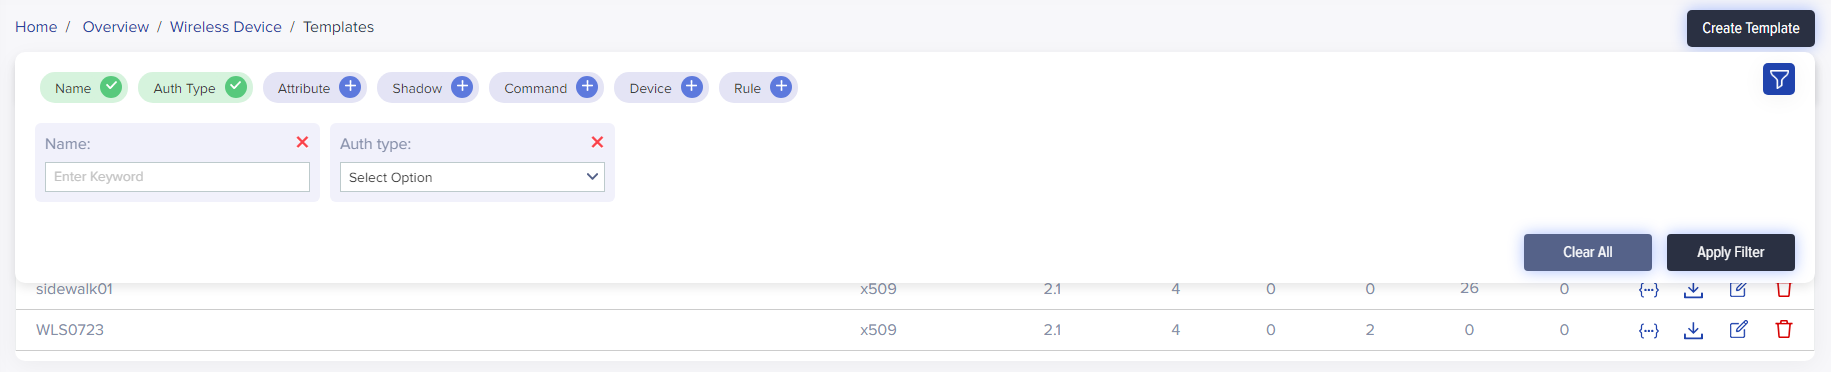
(Screen: Template Filter)
/IOTCONNECT™ offers seven template filters. Apply any filter, enter the required keywords or select an option to retrieve matching results in the template list. Click Apply Filter to apply it.
Edit a template
To edit a template:
- Click on the Edit Template icon from the actions lane.
- It will show you the different fields to edit in a basic template and template features.

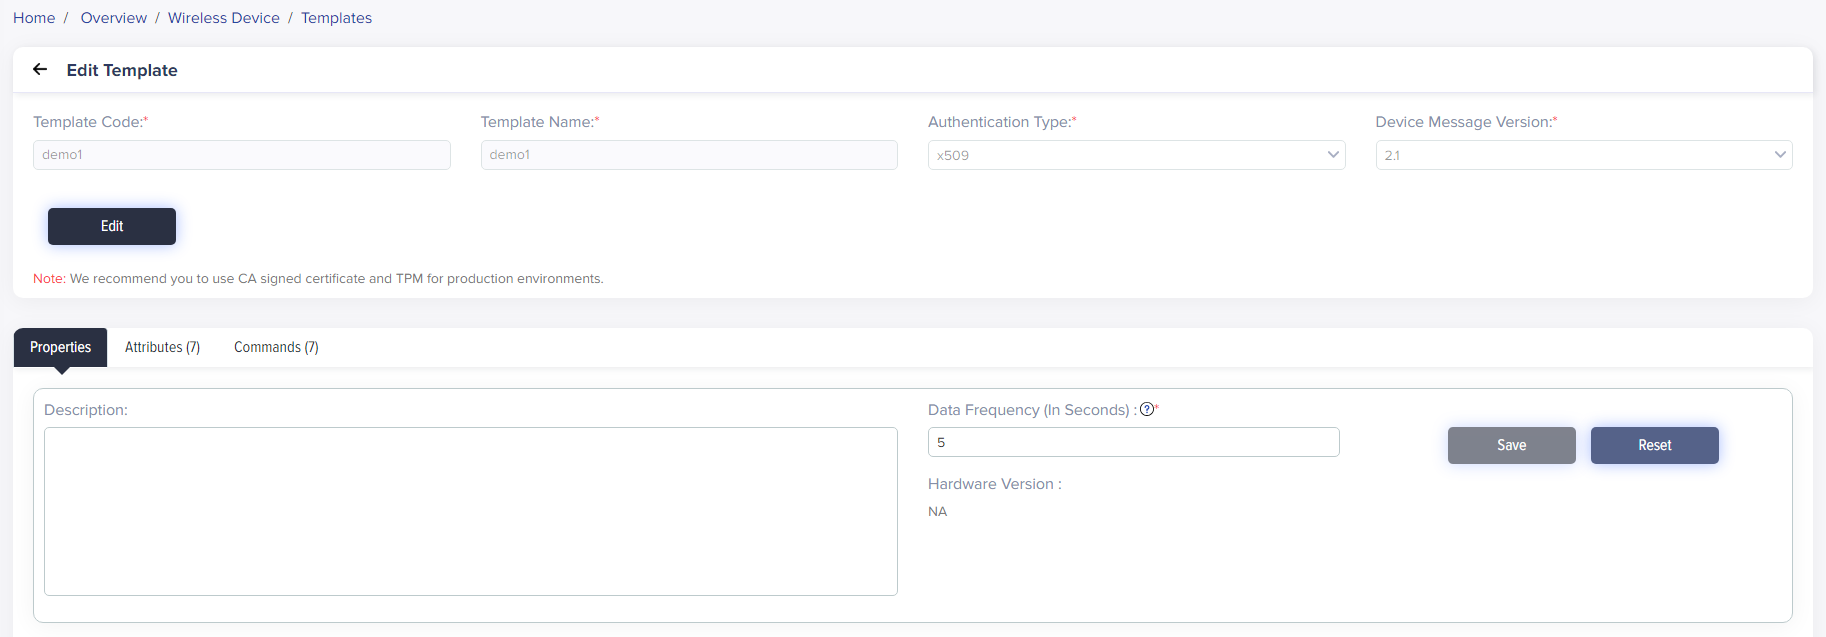
(Screen: Edit Template)
- To edit a basic template, click Edit. Here, you can only edit the template name.
- To edit template features,
- In Properties, you can directly edit the description and data frequency.
- In Attributes, click Attribute name from the right side.
- In Commands, click a Command Name from the right side to allow you to edit on the left.
- Click Save to save the revised changes.
Required fields have a red asterisk on the upper-right side of every field name.
Delete a template
To delete a template:
- Select the Delete Template icon from the actions lane.
- It will present the dialogue box titled ‘Delete’.
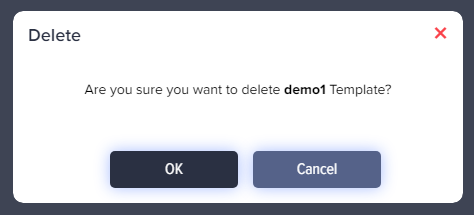
(Screen: Delete Template)
- Click Ok to delete a template.