IDS integration
Overview
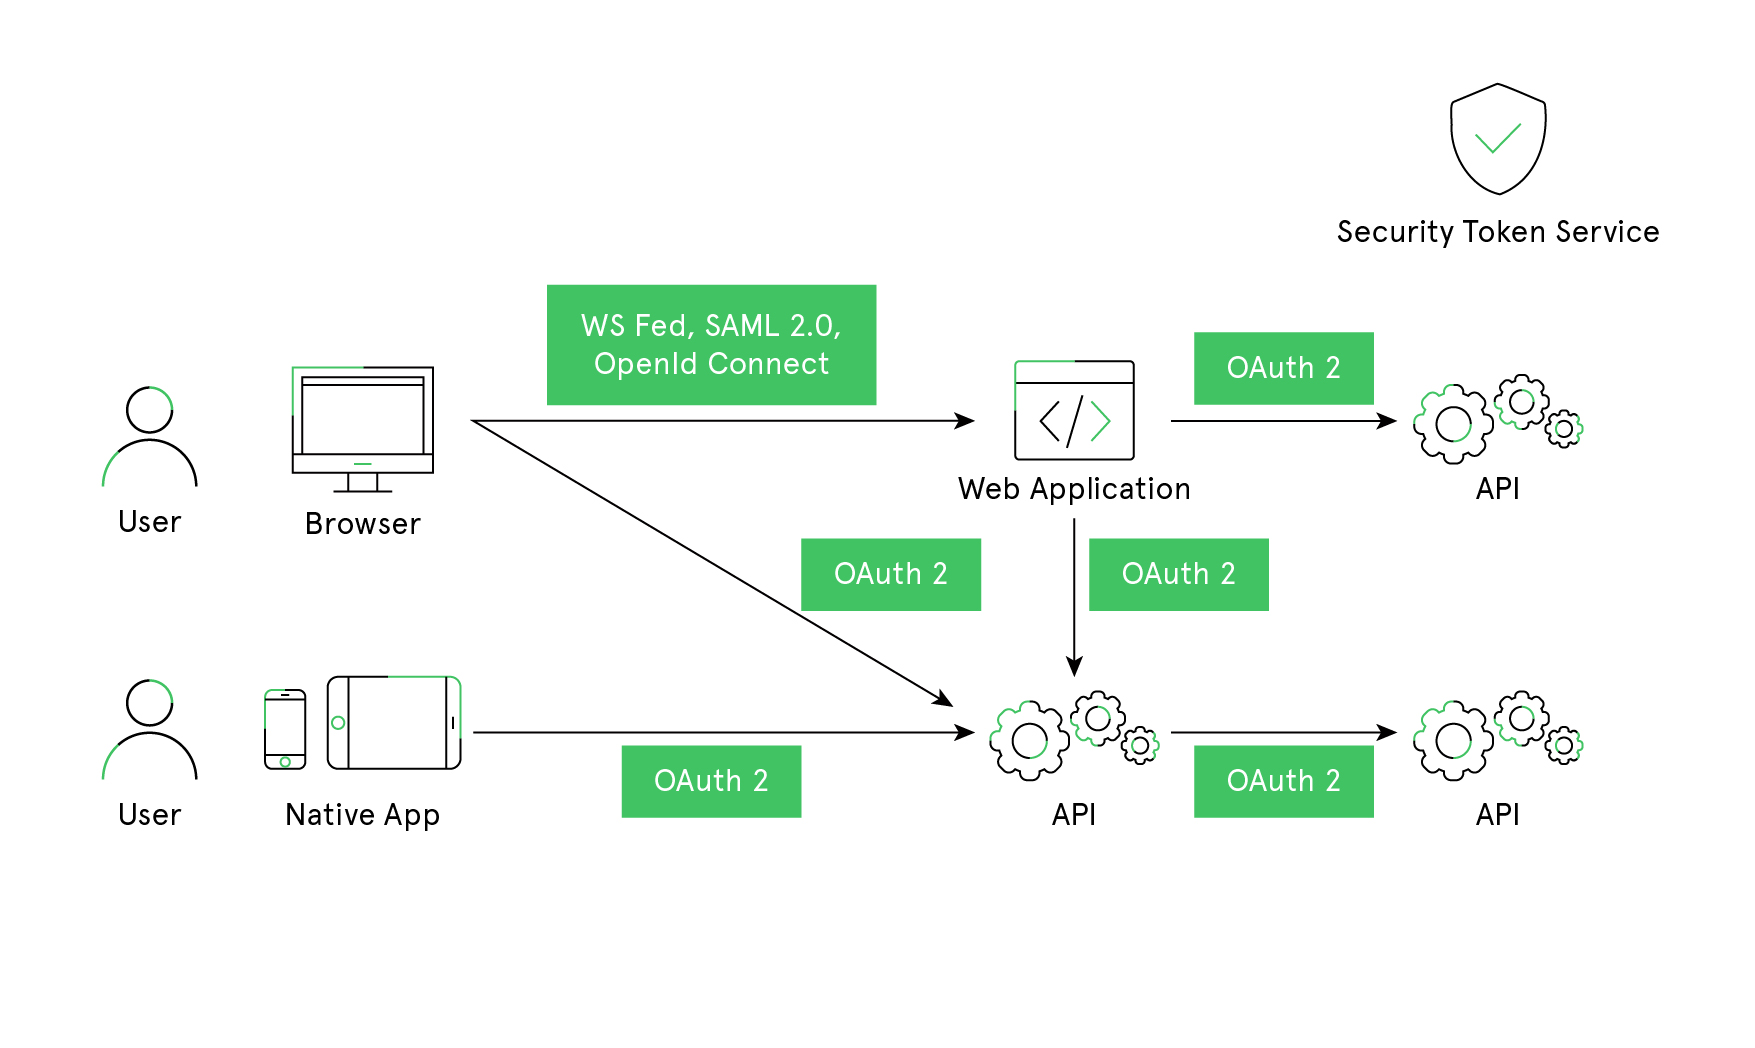
Typically, each application layer (front-end, middle-tier and back-end) resource must be protected by implementing authentication and/or authorization – often against the same user store. Outsourcing these fundamental security functions to a security token service prevents duplicating this functionality across all applications and endpoints.
Restructuring the application to support a security token service leads to the following architecture and protocols:
Authentication
Authentication is needed when an application needs to verify the identity of the current user. Usually, applications manage user data and makes sure that the user data is accessible to an authenticated user only. The most common examples are (classic) web applications – but native and JS-based applications also have a need for authentication.
The most used authentication protocols are SAML2p, WS-Federation and OpenID Connect – SAML2p being the most popular and the most widely deployed.
OpenID Connect is the newest of the three but it is getting wide popularity since it has the potential to cater modern application needs. It was built for mobile application scenarios right from the start and is designed to be API friendly.
How Identity Server can help in /IOTCONNECT™
Identity Server (IDS) is the middleware that adds the spec compliant OpenID Connect and OAuth 2.0 endpoints to an arbitrary application.
Typically, you build (or re-use) an application that contains a login and logout page (and maybe consent – depending on your needs), and the Identity Server middleware adds the necessary protocol heads to it so the client applications can talk to it using those standard protocols.
Below is the architecture diagram that explains how default/external Identity provider(s) (IDP) redirects to /IOTCONNECT™ or external IDP login system using /IOTCONNECT™ Identity Server.
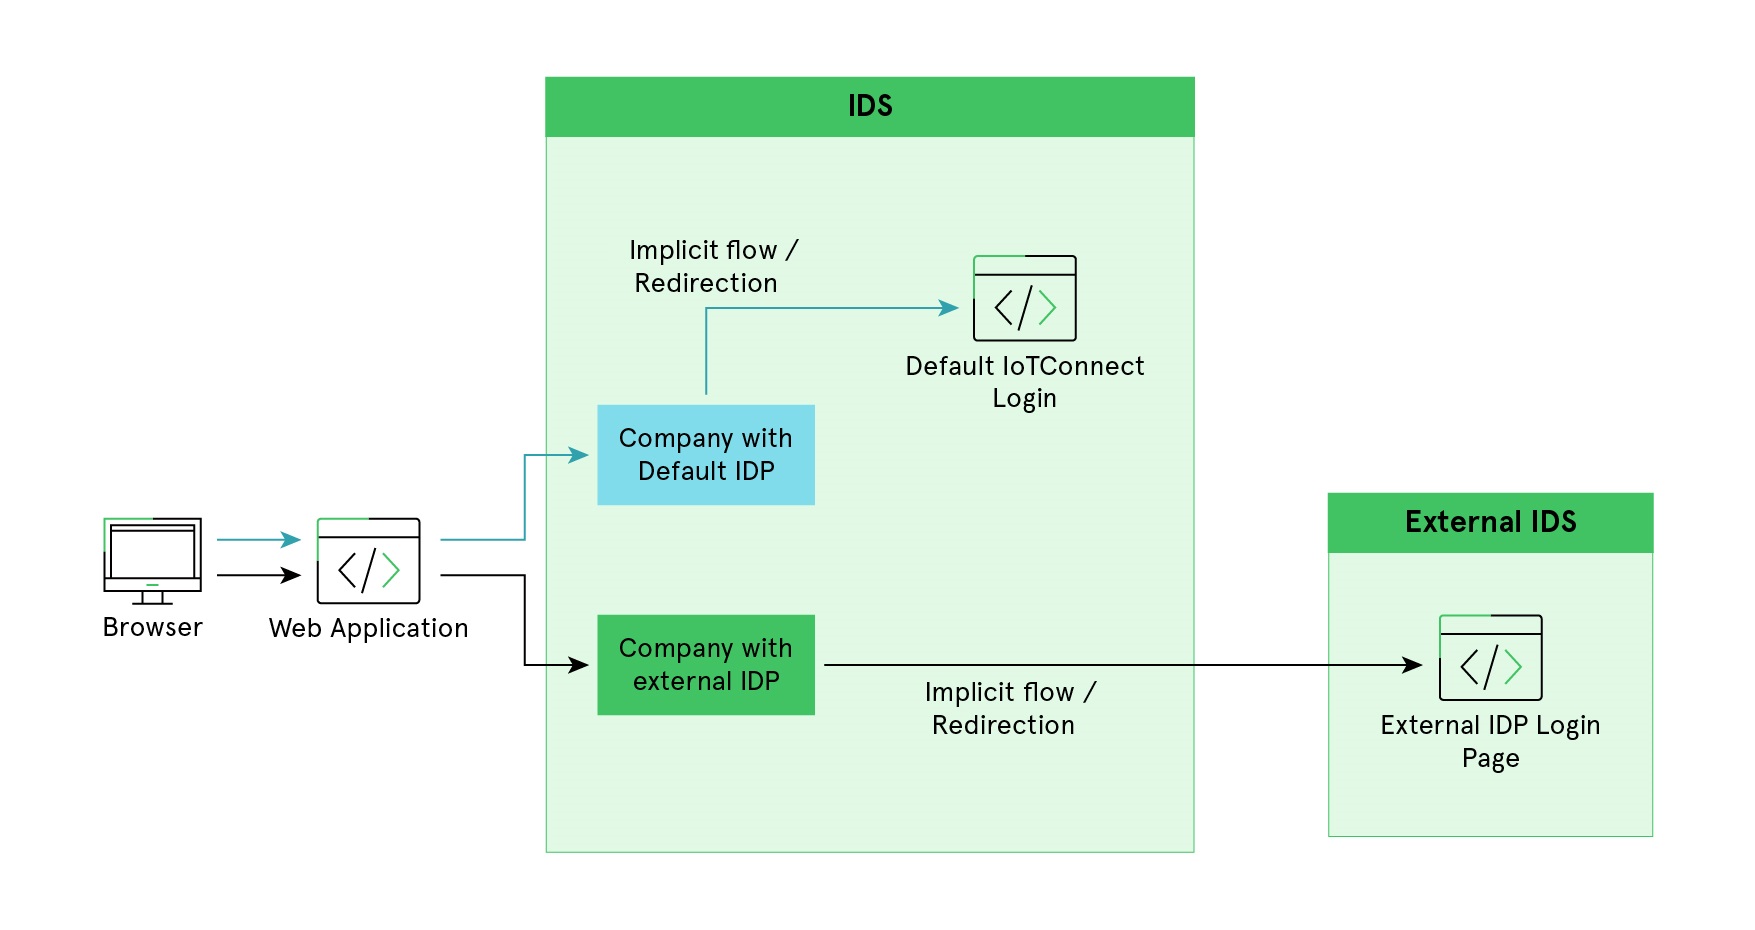
The /IOTCONNECT™ platform supports authentication with default IDP as well as external IDP. Once the company user initiates login from the /IOTCONNECT™ portal, it first redirects to the Identity server (login.iotconnect.io) and verify initial company configuration(s). Finally, the System redirects the user to the /IOTCONNECT™ default login page or external IDP login page based on company configuration.
User Info Stored In IDS
/IOTCONNECT™ IDS stores below-mentioned user information in the data store for both default and external IDP.
- First Name
- Last Name
- Email Address
- Password (In case of default IDP): Hash Encrypted with bcrypt.
- Password Policy (In case of default IDP): Minimum Length (8), Max Length (50), Password must contain at least one upper case character and one special character
- Password RegEx : “^((?=.*?[#?!@$%^&*-])(?=.*[A-Z])).*”
/IOTCONNECT™ – Default Authentication Flow
Custom authentication flow will help companies that do not have any existing user base on any third-party identity provider such as Azure AD, Auth0, Okta etc. It will allow /IOTCONNECT™ companies to store their user information in Identity server SQL database.
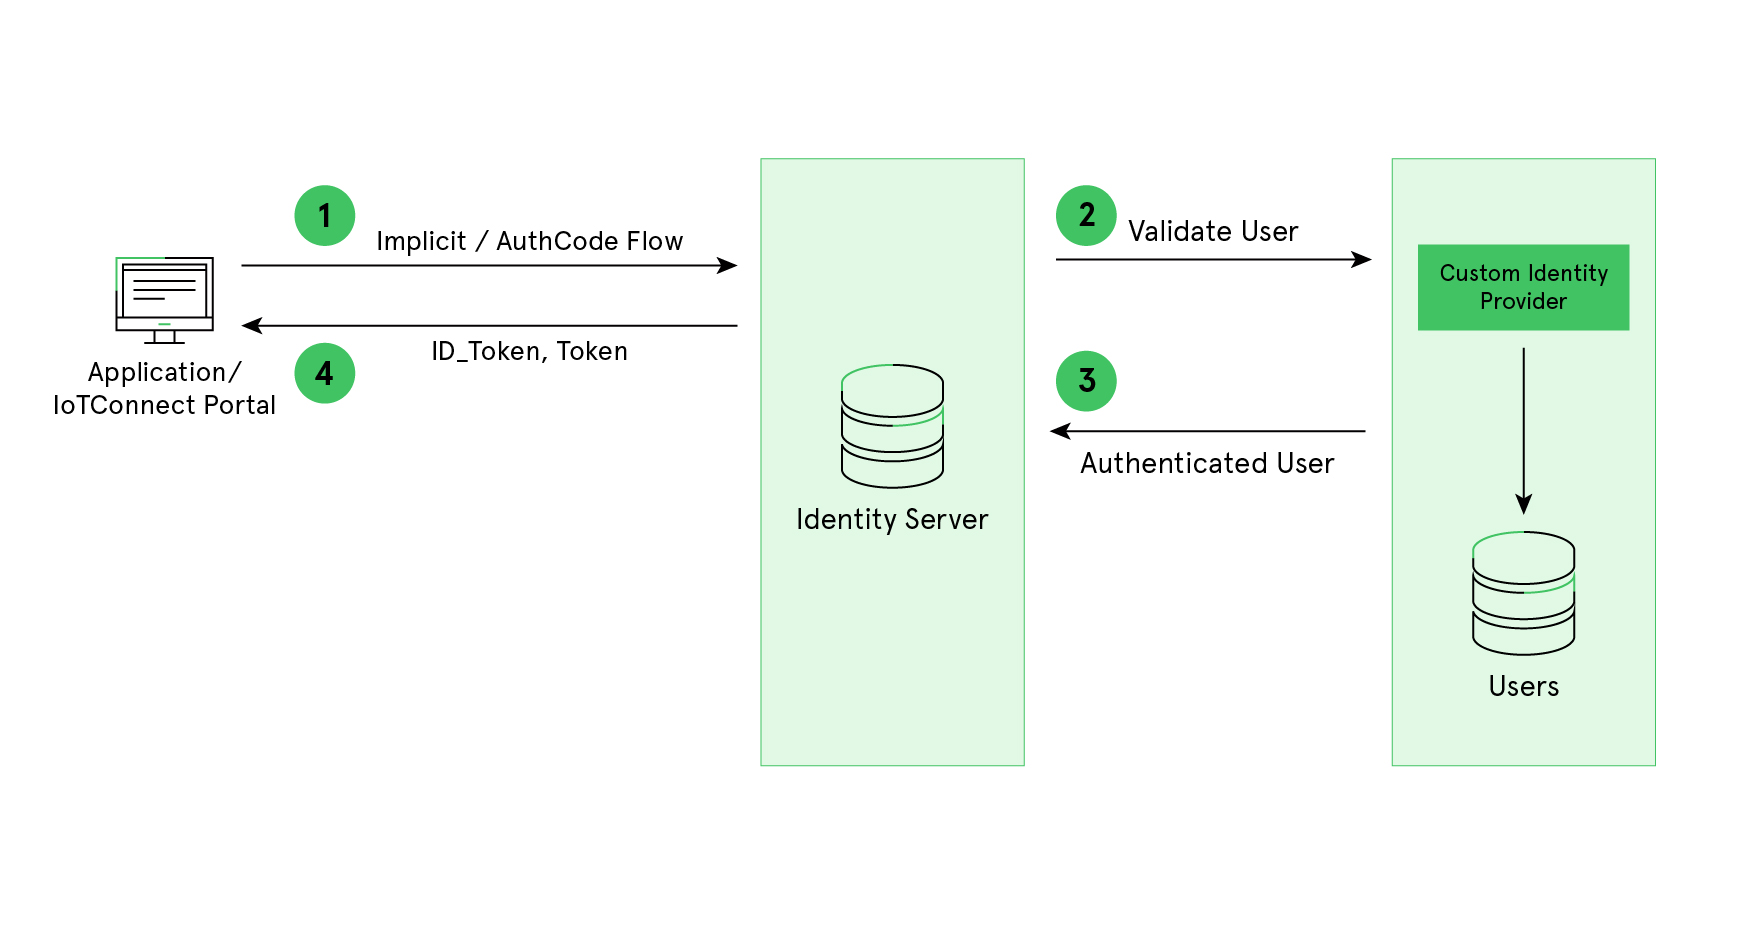
By default, the /IOTCONNECT™ platform provides custom IDP if the company has not defined any identity provider before creating the company in /IOTCONNECT™.
/IOTCONNECT™ – Authentication Flow with external IDP
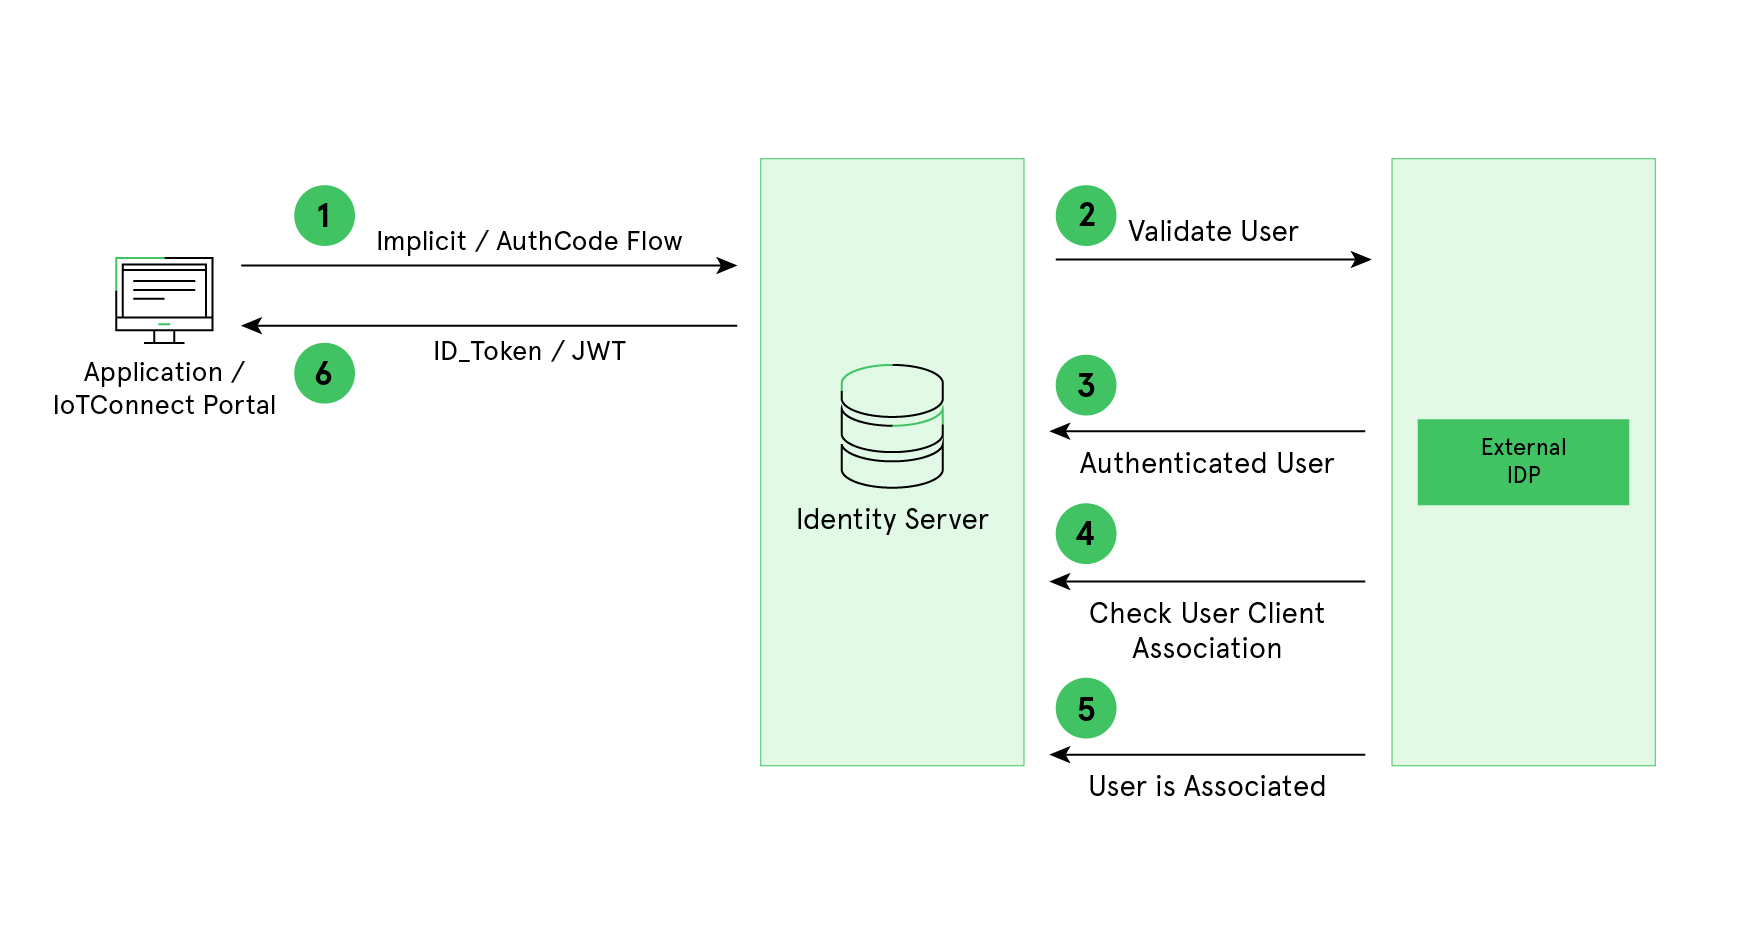
External authentication flow can be useful when any registered company already has an existing user base available on external IDP and want to use the /IOTCONNECT™ platform.
Companies that seek to integrate external IDP with /IOTCONNECT™, must follow certain steps on their account and provide the required information to /IOTCONNECT™. The overall high-level process to integrate external IDP with IDS is depicted below:
Steps to integrate External IDP with /IOTCONNECT™
Let us see how a company can integrate external IDP with /IOTCONNECT™ IDS. We have taken Auth0 IDP as an example below.
To integrate Auth0 with /IOTCONNECT™, a company needs to provide basic information from Auth0 Application to /IOTCONNECT™. The steps that the company needs to follow are as below:
- Create an application on your Auth0 domain
- Provide the client ID and secrets from created application
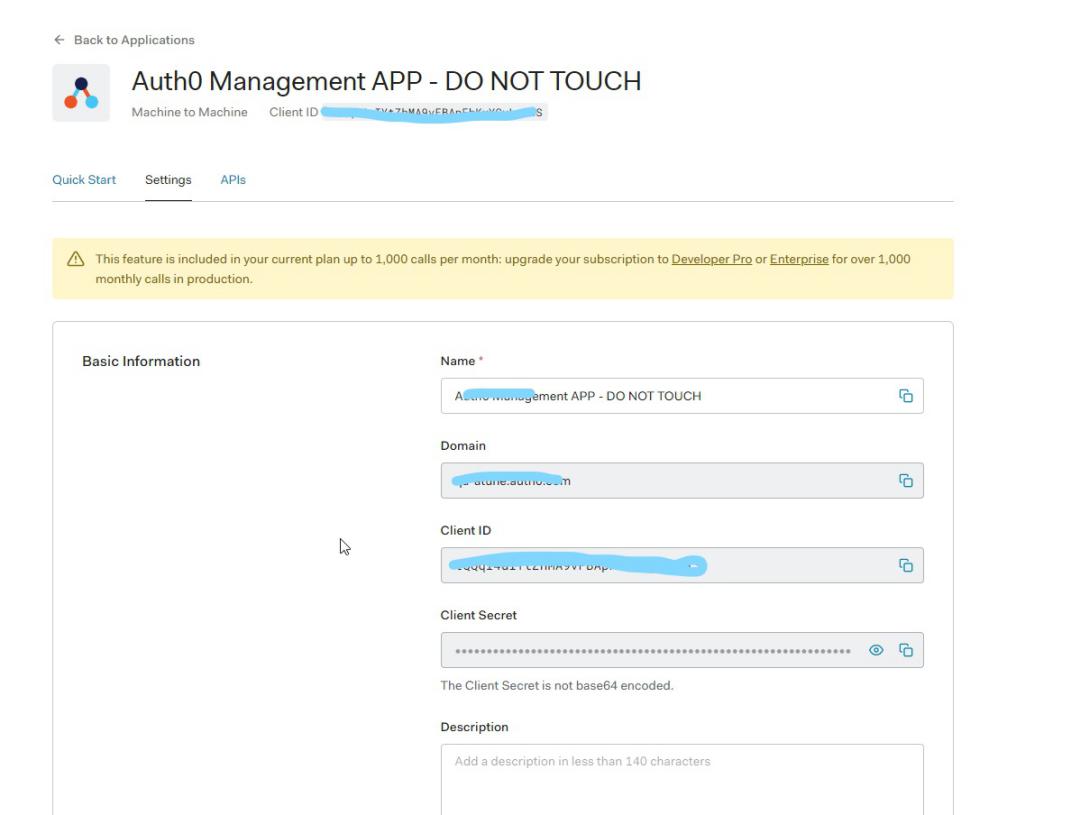
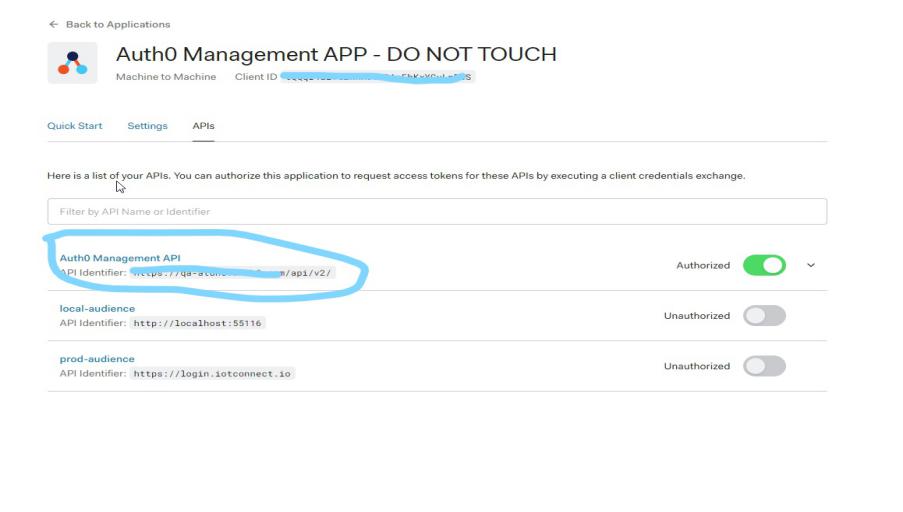
- Enable Auth0 API Management that has user management rights. After enabling, it will provide the API management URL to /IOTCONNECT™. For example: https://yourauth0domain.com/api/v2/
- Setup callback URL of login and logout for /IOTCONNECT™
Allowed callback URL : https://login.iotconnect.io/signin-ascale
Allowed logout URL: https://login.iotconnect.io/signout-callback-ascale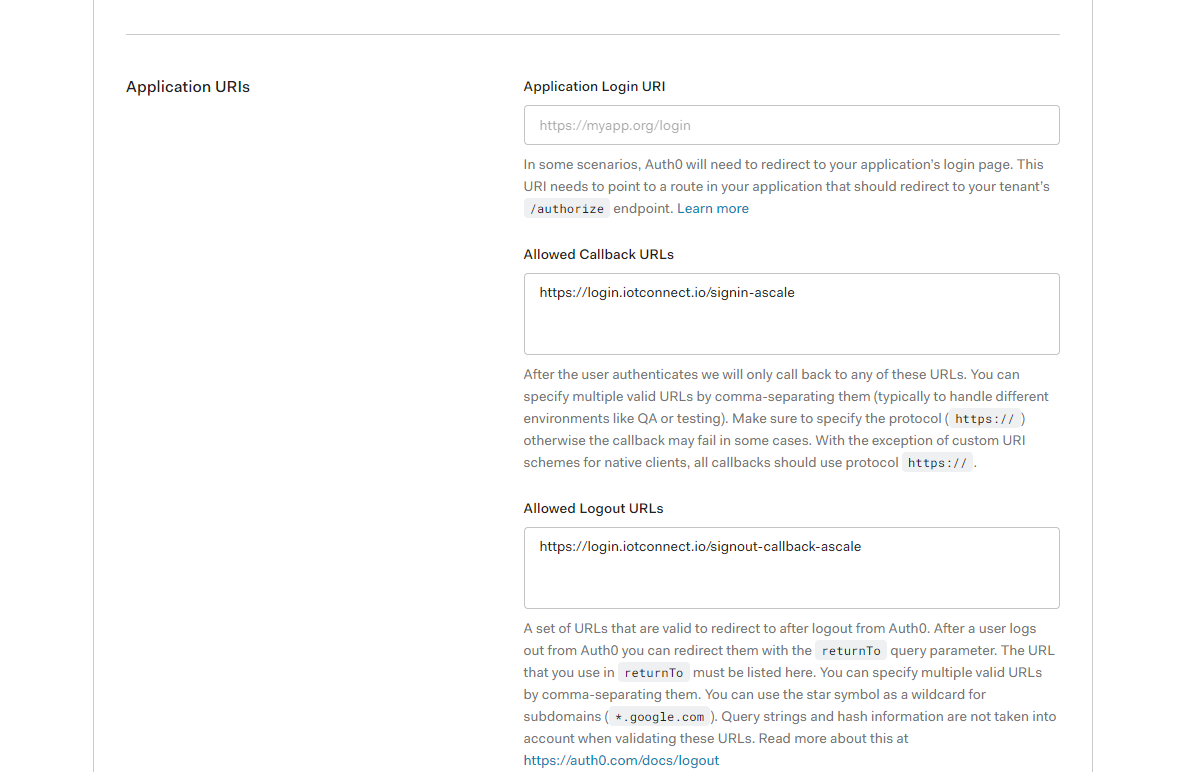
Solutions with /IOTCONNECT™ IDS
/IOTCONNECT™ offers two ways to support authentication for companies who want to build solutions on top of it.
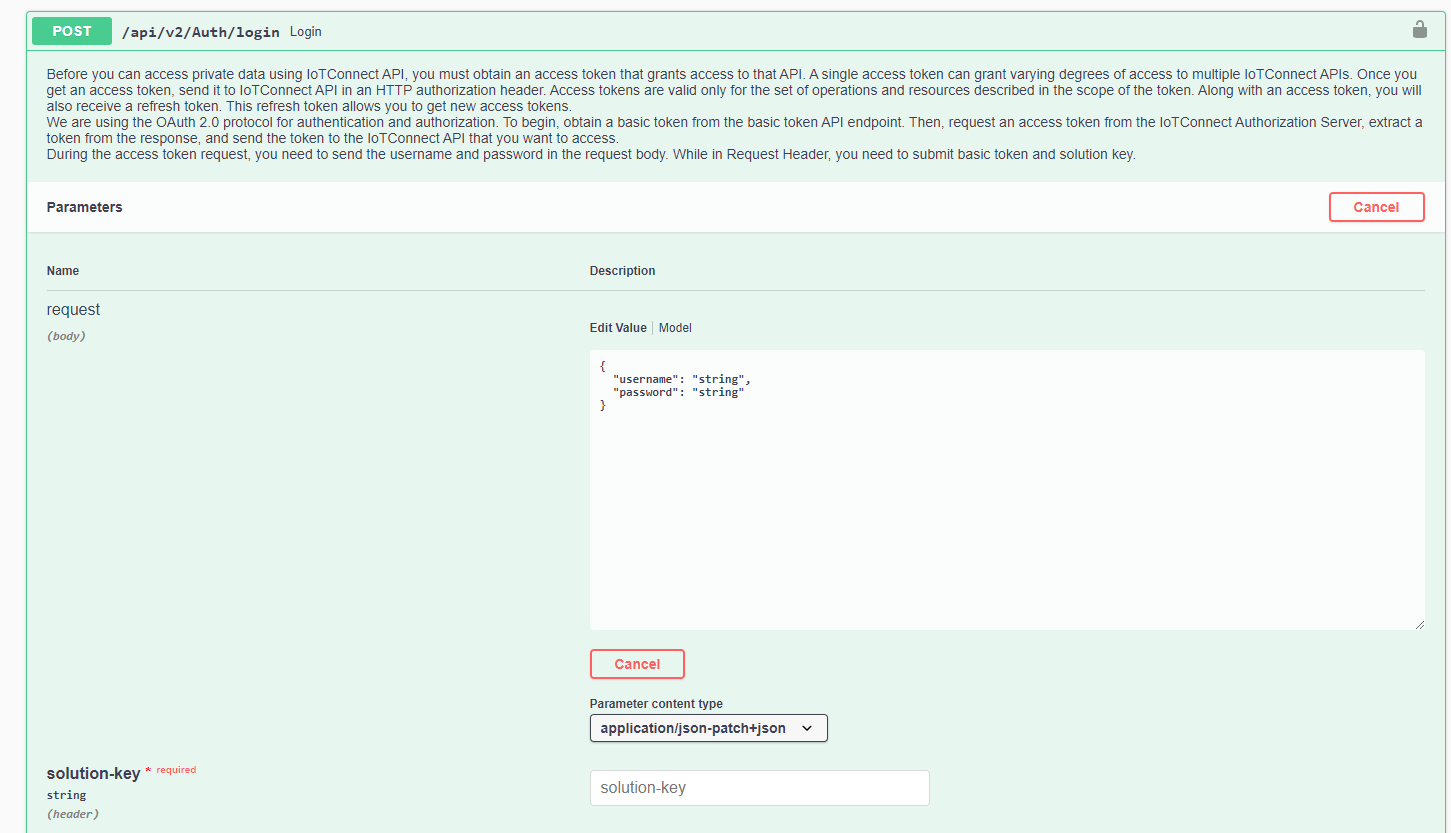
Using /IOTCONNECT™ Authentication API management.
Companies can use /IOTCONNECT™ Consumer APIs management that a Solution developer uses typically to build their Solution on top of /IOTCONNECT™. Solutions can use Authenticate API module to authenticate their users. The solution key is mandatory to perform user authentication. The screenshot to illustrate the same is given below.
Implicit Flow / Redirection Flow
In this flow, the user will be redirected to either /IOTCONNECT™ IDS login page or external IDP login. IDS will decide based on logged in user with company configuration. To initiate Implicit Flow solution the company needs to have the following details to start integrating on their front-end portal (UI). There are different libraries available to integrate Implicit on UI framework. Your library needs to setup the URL given below once all setup is done from /IOTCONNECT™. At Present, Solution developer can provide redirect and logout redirect URL via Email or by creating a support ticket. Alternatively, one can contact /IOTCONNECT™ support team as well.
Authority URL: https://login.iotconnect.io
ClientID: iotconnect
Redirect URL: https://yoursolutiondomain.com/callback
Logout Redirect URL: https://yoursolutiondomain.com
Response Type: “id_token token”
Scope: “openid profile iotconnect.api.fullaccess”
acr_values: “solutionCode:YOUR_SOLUTION_GUID”